A model built from boxes, tubes and lofts in a script looks like what it is: parts bolted together, with a hard seam wherever two of them meet. Draw the same parts as overlapping volumes, melt them into one surface, and cut the sharp details in afterwards, and it reads as one sculpted form instead. This playbook is that method, as a Blender Python script that builds every detail tier of a model from one source and checks its own work.
It comes from a low prototype car for a game. The first version was sent back because it looked assembled from pods, sails and planes. The rebuild below is what the owner asked for: "sculpted, not assembled". The same script builds a 20,000-triangle shell for the game and an 80,000-triangle one for a close-up showroom, and the vehicle showcase entry shows the result.
Before you start
- (default) One script builds every tier, the editable
.blendfiles, the glTF files and a report. Nothing is fixed by hand afterwards. - (default) The main form is a few overlapping closed volumes, built densely whatever the tier.
- (default) The volumes are unioned, voxel-remeshed, smoothed, and only then decimated to each tier's budget.
- (default) A smoother, dense copy of the surface is kept, and the decimated mesh takes its normals from it.
- (default) Crisp lines (openings, vents, shut lines, lamps) are cut after the smoothing, never before.
- (default) Review renders come from fixed, named views, have a quick mode, and resume where an interrupted run stopped.
- (default) A ray sweep over the sides and top finds nothing inside showing through the shell.
- (default) Every node has a unique name with no
.001on it, and a check fails the build if one hasn't.
One script, every tier
Make the script the source of truth. The .blend files it saves are for looking at, not for editing: a fix made by hand there is lost on the next build. Tiers come from the same code with different numbers, chosen by one small helper:
TIER = "showcase"

def sc(showcase, game):
    """This tier's value: the close-up tier's or the game's."""
    return showcase if TIER == "showcase" else game
Take the tier names and modes from the command line, so one run builds everything and another builds only what you are working on:
blender --background --python build_model.py                    # every tier, the report, the review renders
blender --background --python build_model.py -- game            # one tier, no renders
blender --background --python build_model.py -- showcase quick  # small previews while shaping
Have the script write a report beside the models: triangles per tier, per part, and the names the runtime will look for. The next step (content files, a validator) reads the report, never the .blend.
Sculpted, not assembled
Draw the main form as a few closed volumes that overlap generously: a body, two front pods, two rear haunches, fins, a floor. Then make them one surface in four steps:
- Union them with the
MANIFOLDboolean solver, which needs closed, manifold inputs and gives a clean solid back. - Voxel remesh at a fixed size (1 cm here, for both tiers). The surface is rebuilt evenly, and every place where two volumes met is now ordinary surface.
- Smooth it hard. Every junction becomes a soft fillet, as if it had been sculpted.
- Decimate to the tier's triangle budget. This is the only step where the tiers differ.
def sculpt(obj, target_tris, voxel=0.010):
    apply(obj, "REMESH", mode="VOXEL", voxel_size=voxel, adaptivity=0.0)
    apply(obj, "SMOOTH", factor=0.6, iterations=34)
    keep_normal_reference(obj)                       # the next section
    ratio = min(1.0, target_tris / max(triangles(obj), 1))
    apply(obj, "DECIMATE", ratio=ratio)
Loft the source volumes densely, whatever the tier. A remesh keeps whatever facets it is given, so a coarse loft comes out as a faceted sculpture.
Tried on the game's car. The body is eleven overlapping volumes, unioned, remeshed at 1 cm, smoothed (factor 0.6, 34 passes) and decimated to 80,000 triangles for the showroom and 20,000 for the game. The whole car, with wheels, glass and parts, is 138,400 triangles in the showroom and 41,300 in the game.
Shade from a smoother twin
Decimation leaves long thin triangles, and flat or auto-smoothed shading shows every one of them as a facet or a wrinkle in the reflections. So before decimating, keep a copy of the dense surface, smooth it further still, and hide it. After all the cutting is done, lay its normals onto the low mesh with a data transfer of custom normals.
def smooth_normals(obj, reference, max_dist=0.015, sharp_deg=35.0):
    split_edges_sharper_than(obj, sharp_deg)          # cut walls keep their crisp edge
    apply(obj, "DATA_TRANSFER", object=reference, use_loop_data=True,
          data_types_loops={"CUSTOM_NORMAL"}, loop_mapping="POLYINTERP_NEAREST",
          use_max_distance=True, max_distance=max_dist, use_object_transform=True)
The reference is smoothed more than the shape is: that irons out the ripples left where volumes met, while the geometry keeps its form. The distance limit means only faces lying on the original surface take its normals; the walls of a cut opening keep their own. Run it on every piece cut from the shell (panels, glass, lamps, stripes), and delete the reference before export.
Tried on the game's car. The reference took another 30 passes at 0.5, normals were taken within 1.5 cm (2 cm for glass and lenses), and edges over 35 degrees were split first. No facets, wrinkles or jagged reflections remained.
Crisp lines come last
Smoothing softens everything, including what should be sharp. So cut the sharp things after it, into the finished surface, with MANIFOLD booleans: wheel arches, intakes, vents, the openings for glass, and the shut lines round doors and covers. A crease then appears only where the design wants one.
- (default) Glass and lenses first. Before any opening is cut, take the untouched outer skin inside each opening's outline, set it a few millimetres in, and keep it as the pane. It follows the body exactly.
- (default) Panels from the same solid. A door is the solid intersected with its cutter shrunk by half a gap; the body keeps the solid minus the same cutter grown by half a gap. The shut line is even all round: 6 mm in the showroom, 4 mm in the game.
- (default) Pockets follow the skin. A lamp pocket's floor is ray-cast down onto the shell at every point of its densified outline and set a fixed depth below it, so the cutter can never fold through a curved surface.
- (default) Mark what a cut made. Give cutters their own material and turn the faces they leave into a dark liner, so every cut wall reads as depth, not as paint.
- (default) Clean up after long chains of booleans. Weld near-duplicate vertices and dissolve zero-area faces: they are slivers that z-fight with their neighbours.
- (default) Skins stand off. Stripes and liveries are thin skins cut from the same faces and lifted 4 mm, so they follow every facet and never z-fight with the paint.
Review renders you can trust
Judge the shape from renders, not from the viewport. Keep a table of named views (three-quarter front, side, rear three-quarter, top, front, rear, low, a wheel close-up), each a camera position, a target and a lens, with orthographic side, front and top views for proportions. Render them in a fixed studio: a dark floor and wall and a set of area lights, the same every time, so two renders differ only where the model did.
- (default) A quick mode for shaping: small frames and few samples (24 samples at 800×500 here, against 96 at 1600×1000 for final frames), and a way to show only the parts you are judging.
- (default) Resumable runs. A full set (stock views, open panels, the variants, an x-ray with the shell hidden) takes long on a CPU, and runs get interrupted. With a switch set, skip any frame that already exists:
for view in views:
    scene.render.filepath = os.path.join(REVIEW_DIR, f"{tag}_{view}.png")
    if os.environ.get("MODEL_RESUME") and os.path.exists(scene.render.filepath):
        continue                     # finished on an earlier run: keep it
    bpy.ops.render.render(write_still=True)
The catch is the other side of the same switch: a kept frame shows the model as it was. After a change, delete the frames it affects before resuming, and write down which frames are current.
Tried on the game's car. After a fix pass, six showroom views and three game views were rendered again. The doc kept a list of the other frames, which still showed a side scoop that had since been removed, with the one command to bring them up to date once deleted.
Nothing shows through
A tapering shell will sooner or later have something poke through it: a seat back, a roll hoop, a suspension arm. In a three-quarter view it is a small grey wedge that is easy to miss and hard to name.
Sweep rays over the whole model, from the sides and from the top, and look at what each ray hits first. It should be the shell, its glass, or a part meant to be seen. Any interior or chassis part hit first is showing through. Fix the part, not the shell: keep it inside, then sweep again until nothing is found.
Not everything that looks like a part showing through is one. A light shape seen through the windscreen head-on turned out to be the studio light reflected in flat-shaded glass. Smooth-shading the glass (its normals from the reference) and making it less reflective removed it. When the sweep finds nothing, look for a reflection.
Tried on the game's car. A grey wedge at the rear pillar in profile was the seat backs and the roll hoop showing through the narrowing canopy. They now taper and stay inside it, and a ray sweep of the whole car, sides and top, finds no interior or chassis part through the shell.
Names the runtime can trust
The runtime finds parts by node name: mounts, pivots, hinges and every option. Blender quietly renames a second object called Spoke to Spoke.001, and the glTF file then carries that name. So:
- (default) Name in code, uniquely. Give repeated parts a counter of your own (
Spoke,Spoke_1,Spoke_2) as you make them. - (default) Fail the build on a duplicate, or on any name ending in
.and digits, just before export. - (default) Check the exported file too. Read the node names out of the glTF's JSON chunk and fail on duplicates, unnamed nodes, and any name the content refers to that the file lacks.
- (default) Alternatives under their own nodes. Each set of options (wheels, wings, mirrors) sits under its own mount node, so tools that compare geometry never compare two options that are never shown together.
def assert_unique_names():
    seen = Counter(o.name for o in bpy.data.objects)
    bad = sorted(n for n, k in seen.items() if k > 1 or n.rpartition(".")[2].isdigit())
    if bad:
        raise ValueError(f"non-unique or auto-suffixed node names: {bad}")
Check the finished files for overlapping coplanar faces as well, which flicker as z-fighting: z-fight check finds them in about linear time and holds old models to a baseline that only goes down. Gate a file before loading it at runtime with glTF motion's checks.
Tried on the game's car. Both tiers have zero coplanar overlaps. The content for its 81 parts over 48 mounts is generated from the builder's report and checked by a validator that reads the node names inside both files.
As of November 2026: the models were built with the
bpy5.2.3 module (Blender 5.2 LTS as a Python wheel), which runs the build scripts unchanged and without Blender's interface. TheMANIFOLDboolean solver, voxel remesh and custom-normal data transfer are all in that release.
Parts that show it
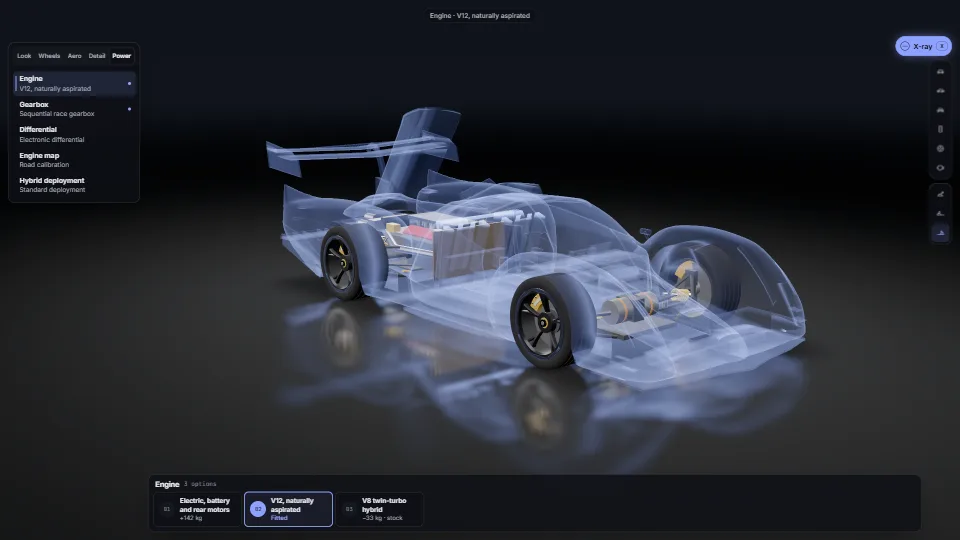 UI & interaction
Vehicle showcase with x-ray
A staged bay for any glTF vehicle whose parts are named nodes.
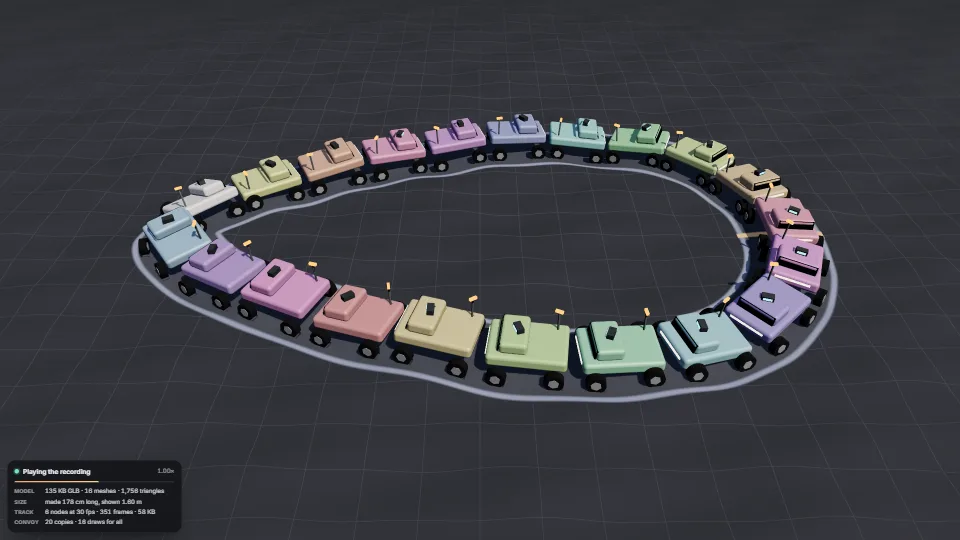 Techniques
glTF models with recorded motion
GLB models ready for a stage: gated before loading (header, size and count budgets, allowed extensions, nothing outside the file, each refusal with a plain…